29 Easy, Adorable, Last-Minute DIY Valentine's Day Gifts To Impress Your Boo
You can perfect the art of procrastination.
 getty
getty Now that the month of love is in full bloom, there's something that you may be itching to cross off your agenda. The closer we get to Valentine's Day, the more apparent it becomes that we're going to have to scramble for that absolutely perfect gift for that special someone.
That's where these amazing last-minute DIY Valentine's Day gifts come in. And you won't be disappointed.
For fellow procrastinators, these insightful words by Bill Watterson have never looked more promising: "You can't just turn on creativity like a faucet. You have to be in the right mood. What mood is that? Last-minute panic."
Luckily, these swoon-worthy Valentine's Day gift ideas will prove that you don't have to be a DIY connoisseur to avoid showing up empty-handed.
The greatest aspects of these gifts are that they're easy to make and can be done in your spare time, showing that a little TLC goes a long way. Plus, you'll save yourself from feeling like you're in the hunger games along with all of those crunch-time shoppers.
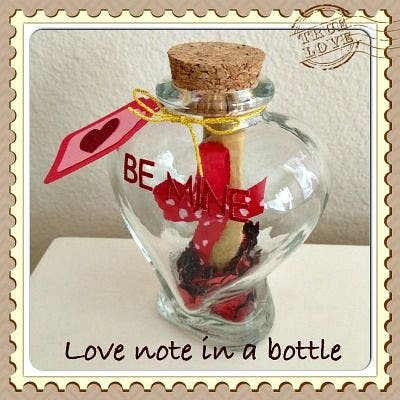
1. Love Note in a Bottle
Supplies:
- Tag Paper Punch
- Paper
- Mini hole punch
- Stickers
- Glass bottle
- Confetti hearts
- Ribbon
Instructions:
Not only is this easy to make (writing your love note and decorating the bottle with confetti hearts, and stickers... Could life be any simpler?), it's a great idea for a thoughtful and personal custom gift.
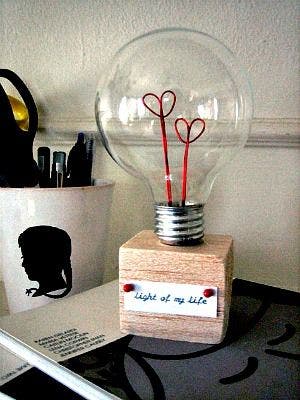
2. Valentine Light Bulb
Supplies:
- Red thin gauge wire (available at craft stores)
- Light bulb (any standard incandescent bulb with a regular size base will do, but no fluorescent or halogen bulbs)
- Pliers
- Screwdriver
- Safety goggles
- Scrap piece of wood or wood cube (craft stores usually sell wood for crafts and would have a small square or chunky piece that would work)
- 2 pins
- Paper and pen (or type written message)
- Wire cutters
- Hammer and nail (Optional — if you are using soft balsa or craft wood, these are not necessary)
- Hot glue gun
Cost:
- Wire: $2
- Wood scrap or cube: $2
- Tools, paper: on hand
Time: 1 hour
Instructions:
- Prepare a surface on a work table for hollowing out the bulb. Make sure the area is large because little chunks might jump off the base when you crack the glass.
- Follow these instructions on how to hollow out the light bulb. These are easy to follow instructions that also give good tips on safety and procedure.
- When you have your bulb ready, clean the outside carefully and put it to the side somewhere where it is protected from breaking.
- Cut a ten inch piece of wire to make a heart "filament." Fold the wire in half to create a sharp crease, then unfold. About an inch from the crease, take both loose wire ends and loop both wires around to create the heart halves. Then pull both wires back down, overlapping the center of the crease and extending beyond the heart shape. You may want to tweak the heart halves a little to get heart shape that you like. Your heart should be about 1/2" wide so it will fit through the base of the bulb pretty easily.
- If you want two or more heart filaments in your bulb, repeat step 5 one or more times.
- Take your filaments to your bulb and hold them up to see how long the stems need to be to have the heart filaments positioned in roughly the center of the bulb. Use your pliers to cut the extra wire off the ends. Also test that they fit into your bulb without having to smush them or distort the shapes. If that is the case, make them smaller.
- If your wood is soft, you should be able to poke the wire filaments down into the top of the wood and they will stay in position. If you are using a firmer wood, use a hammer and nail to create a small guide hole. Then remove the nail and push the wire down into the hole. You may want to secure these with glue as well.
- Now fit your glass bulb over the filaments and glue the bulb down to the wood at the base.
- Use the pins to attach your love note or message to the front of the piece of wood.
3. Heart-Shaped Tea Bag
By Her Imajination

Supplies:
- String
- Needle
- Scissors
- Construction paper
- Tea bags
- Tea leaves
- Tablespoon
- Coffee bag (optional)
Instructions:
- Cut construction paper in the shape of a heart so that it's big enough to fit a teaspoon of tea leaves.
- Put the heart over the tea bag and sew around it. Make sure each stitch is close together so there is no room for the tea leaves to fall out.
- Leave about an inch opening to fill the heart with 1 tablespoon of tea leaves.
- Make a funnel with a piece of paper and insert it into the opening.
- Scoop a tablespoon of your favorite tea.
- Fill the heart through the funnel with the tea leaves.
- Evenly distribute the tea leaves inside the heart.
- Take the funnel out and make sure all the tea leaves are inside the heart.
- Complete stitching the heart.
- After the heart is completely stitched, tie a knot and cut the remainder of the string
Tea tag:
- Cut out a tea tag in any shape you like.
- Take a needle with thread (8 inches if single strand; 16 inches if double strand) and put it through the tea tag.
- Grab the heart-sewn tea bag and put the needle through the crevice of the heart.
- Pull the string through the tea bag to the desired length.
- Tie a double knot and cut the remaining string.
- Cut around the heart (make sure to not cut too close to the stitch).
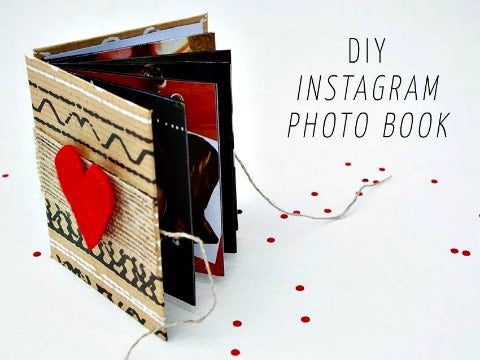
4. Instagram Photobook
By Crème de la Craft
Supplies:
- 3” x 3” Instagram photos (download/print photos using Instaport, Prinstagram, FoxGram and PostalPix)
- 6” x 3” cardstock paper (you’ll need 1 sheet for every 2 photos)
- Glue stick or tape runner
- 2 pieces of 3.5” x 3.5” chip board (you can also upcycle a notebook cover or cereal box)
- Decorative scrapbook paper (for the covers)
- Red felt
- Twine
- Scotch tape
- Scissors (or a paper trimmer for super straight lines)
Instructions:
- Cut out your Instagram photos using scissors or a paper trimmer.
- Fold cardstock paper in half. Attach all the pieces together using a glue stick as shown above.
- Attach Instagram pictures to the cardstock panels using a glue stick.
- To create the front and back covers, cover the chip boards with your favorite decorative paper using a glue stick.
- Lay the twine over the cardstock paper and tape in place, as shown below.
- Attach the chip boards to the front and back of the cardstock using a glue stick.
- Decorate the cover as you wish.
- Tie a bow with the twine to close.
5. Mason Jar Candles
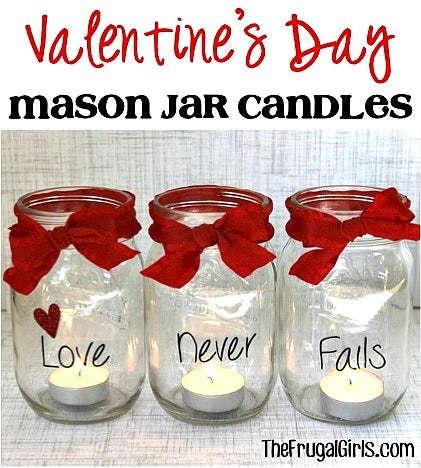
Supplies:
- Mason jars
- Red ribbon
- Tealight candles
- Silhouette machine with black adhesive-backed cardstock, or vinyl sticker letters
Instructions:
- Using your Silhouette Software, type the words: "Love Never Fails"
- Apply a piece of black adhesive-backed Silhouette cardstock to your Silhouette cutting mat, and send through the machine to cut your words.
- OR if you don’t have a Silhouette, simply use vinyl letter stickers!
- Affix your letters to your mason jars.
- Tie a bow with some pretty ribbon.
6. Love Mug
By Serenity Now
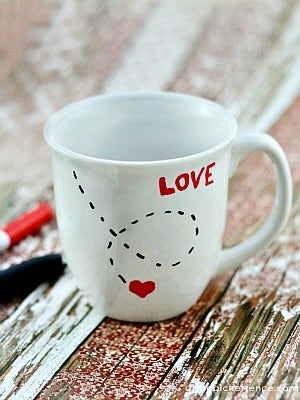
Supplies:
- White porcelain or ceramic mug
- Red and black paint pen
Instructions:
- Draw a fun design.
- Decorate both sides if desired. Place on cookie sheet in cool oven.
- Bring to 350 and bake for 20 minutes.
- Allow to cool in oven.
- Consider hand-washing to maintain design.
7. Date Night Idea Jar
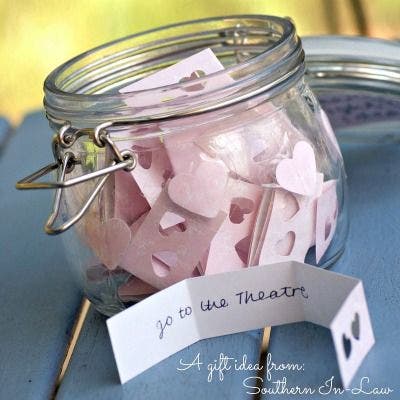
Instructions:
- Get a clean (preferably pretty) jar.
- Cut strips of paper.
- (Optional): Use a heart shaped hole punch to punch hearts on one end of the paper.
- Write out your date night idea.
- Fold the piece of paper up and pop it into the jar.
8. DIY Liquor and Hearts Valentine
By Mr. Kate
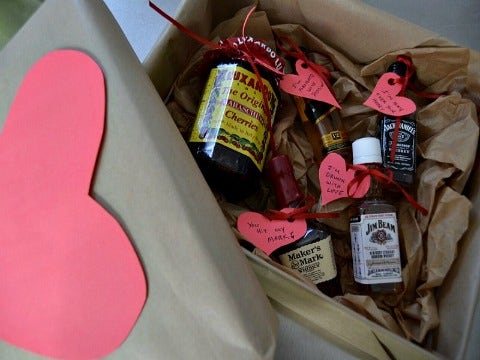
Supplies:
- Nips (mini liquor bottles from your local liquor store)
- Garnish using fancy maraschino cherries to go with the bourbon and whiskey, and you could do limes and salt with tequila.
- Ribbon
- Red construction paper
- Scissors
- Hole punch
- Shoe box
- Craft paper and/or tissue paper or wrapping paper
- Paint of glue
Instructions:
- Cut out heart shapes from the construction paper and punch holes in them for the ribbon.
- Write drink-themed love sayings on the hearts and wrap them around the necks of the nips with pieces of ribbon.
- Wrap the shoe box in craft paper or wrapping paper and put a cut-out heart on the top or whatever you want for decoration.
- Nestle the bottles and garnish inside the box on a bed of crumpled tissue paper. Cover with the lid and get ready for a good time!
9. Vintage Love Notes
By Holy Craft
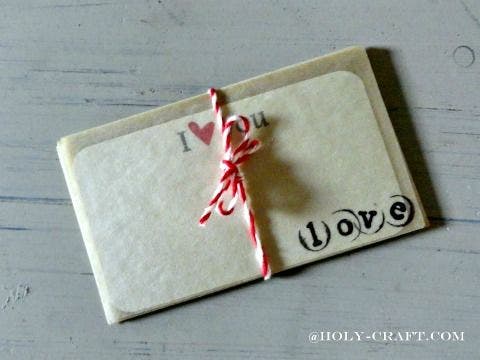
Supplies:
- Vintage glassine stamp envelopes
- Twine
- Stamp
- Note cards
Instructions:
- Create a set of note cards that fit perfectly inside the envelopes.
- Stamp each envelope with a simple statement of love.
- Wrap each set of five with bakers twine. Ready for a personal message for your special loved ones.
10. Sweetheart State Map
By Craft Cuts
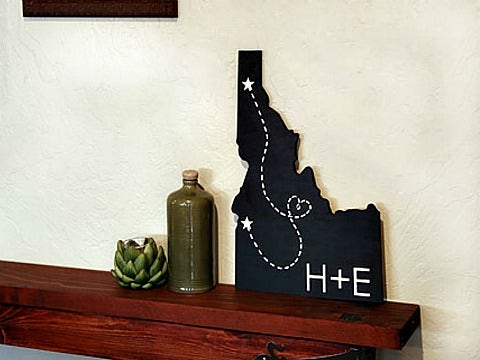
Supplies:
- Wood State Shape (18" tall x 1/2" thick)
- Wood Letters; use 2" tall ones that are 1/8" thick and in the Century Gothic font
- 2 Wood Star Shapes (1" tall x 1/8″ thick)
- White and black craft paint
- Craft glue
- Foam paint brush
- Fine and medium bristle paint brushes
- Pencil
- Paper plate
Instructions:
- Use the black paint and foam brush to coat the face and sides of the state. This may take two coats to get consistent coverage.
- Use the white paint and mid-size paint brush to paint the front and sides of the stars and letters. Set aside to dry.
- Use the pencil to sketch the location of the dotted line.
- Use the white paint and fine tipped brush to paint in the dotted line.
- Apply the craft glue to the back of the letters and stars.
- Carefully place the letters and stars onto the state plaque. Wipe away any excess glue.
11. Sharpie Mugs

Supplies:
- Cheap ceramic mugs (the cheaper, the better
- Oil-based Sharpie marker
- 1-2 Q-tips
- Rubbing alcohol (for mistakes)
- A pencil
Instructions:
- Ensure the mugs are fully washed and dried to remove any residue.
- Using a pencil, sketch your design on each mug.
- Once you’re happy with your sketch, carefully trace it with the Sharpie.
- Let the mugs sit for a few days before throwing them into the oven to "bake" the design on them.
- Preheat your oven to 425° and bake for 35 minutes. To prevent any cracking in the mug, put the mugs on a cookie sheet and put them into the oven as soon as you turn the heat on.
- Once the 35 minutes is up, turn the heat off and left them in the oven to cool down as well. Take out after 1 hour.
12. Memory Candles
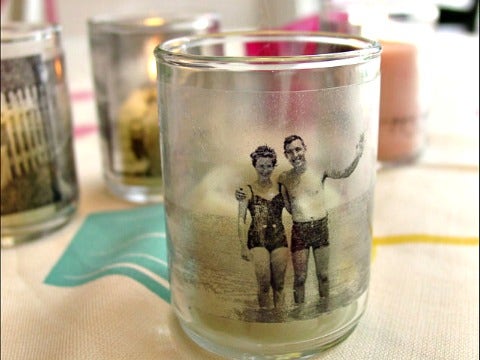
Supplies:
- Black and white photocopies
- Transparent contact paper to transfer images
- Glass votive candleholders
Instructions:
- The first thing you want to do is find images that you want to use. Old black and white photos work best because of the high contrast.
- When you photocopy the image, play around with the contrast and resolution controls on the copier to get the results you desire. Again, high contrast works best. It's bet to photocopy the images or print using a laser printer, not an inkjet printer.
- Use the small votive cylinder candleholders found commonly at craft stores. If you use this size, size your photographs to fit on a 2" high x 6.5" long strip.
- Cut a piece of the transparent contact paper (usually found with the shelf-liner papers at discount stores) to fit over your photo layout.
- Peel the backing from the contact paper and place the photocopied image ink-side to the sticky side of the contact paper. If there is any excess sticky parts of the contact paper, adhere plain white paper to it.
- Burnish or rub the contact paper to the inked parts of the photocopy. It's best to do this from the paper side instead of the plastic contact paper side. Be careful to rub all of the areas of the image where there is ink.
- Trim the contact-paper-covered print out to size. Please note: It works best to let the contact paper wrap around the candleholder completely.
- Next, soak the paper-covered plastic in a sink of warm water for at least 7 minutes.
- Some of the paper may begin to fall off on its own. Working under running water, carefully roll your thumb and/or fingers over the inked plastic to remove all of the paper.
- Don't rub too hard or the ink will start to come off.
- After all the paper is removed, allow the strip to dry, inked (and soon-to-be-sticky-again) side up on a table or counter. As long as the contact paper is wet, it isn't sticky. As it dries, the tackiness will return. You may see bits of paper you missed when the piece was wet. If this happens, just work with it under running water, using your thumb to rub off all traces of paper.
- Finally, adhere the inked contact paper to a clean and dry glass votive holder. Add a candle.
13. "Open When..." Letters
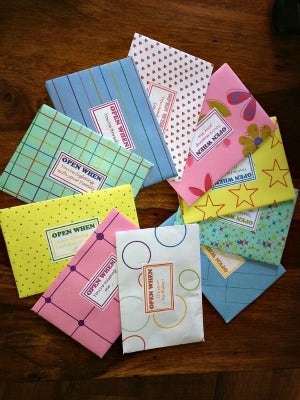
Supplies:
- A pair of scissors
- White paper
- Colored card
- A stick of glue
- A pen
- Confetti
- Surprises to put in the letters
Instructions:
- First step is to get together all the equipment you're going to need.
- The next step is to print different designs on all of the different colored cards. These are going to be your envelopes.
- Next you have to take an envelope (use a 5x7 so it can fit on an A4 page) and trace all around it so that it makes a template for your envelope.
- Cut out your template.
- Fold in the sides the same way the envelope you started with was folded.
- Put some glue along each side of the bottom flap, which is the one with the straight top. (Make sure you only glue the sides! If you glue the top it will stick to the inside of the envelope.)
- Fold in the two side flaps and fold the bottom flap (the one you just glued) onto them and press. This should now look like an open envelope.
- Choose what you want your letters to consist of or be for and type out your labels (i.e. "Open when you need my love", "Open when you're missing me").
- Stick your labels onto your envelopes.
- After writing your letters, put your little surprises and confetti into the envelopes and seal.
- You can seal with the glue stick or by sticking the top flap into the envelope.
- Tie a bow around the letters for a nice look.
14. Cuff Links
By PLAID
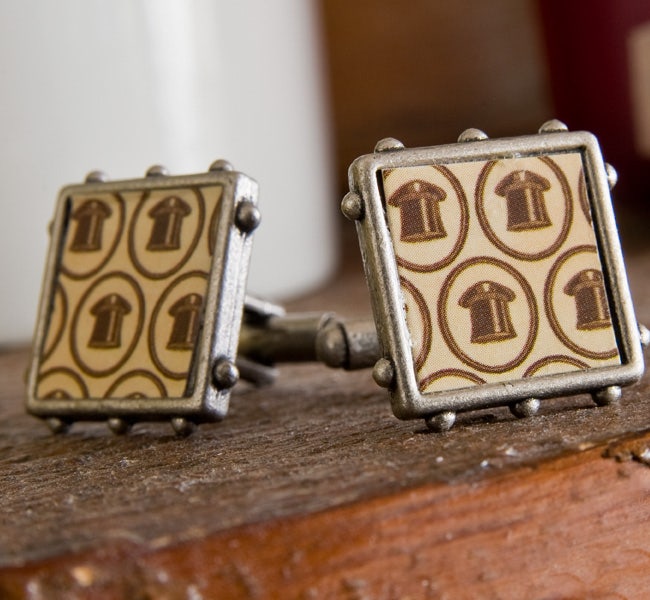
PLAID Supplies:
- Mod Podge ® Matte, 8 oz.
Other Supplies:
- Cuff link blanks with trays
- Scrapbook paper (small print)
- Scissors
- Foam paintbrush
Instructions:
- Using the inside of the well of the tray as a guide, trim the paper to fit inside the well.
- Apply a thin coat of Mod Podge to the back of the paper. Position the paper in the well of the tray. Press any air bubbles with your fingers. Allow to dry for 15 minutes. Once dry, top coat with a layer of Mod Podge. Allow to dry for 3 hours.
15. Little Love Surprises
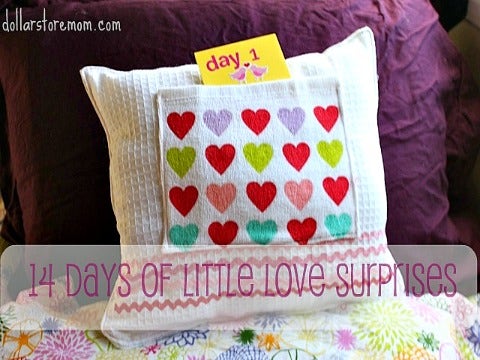
Supplies:
- Valentine towels
- Poly fill to stuff pillow
- Basic sewing supplies
Instructions:
- Iron towels to remove creases.
- Cut rectangle for the pocket from one towel. Cut it so the top of the towel (which already has a lovely hem) can serve as the top of the pocket.
- Hem the other 3 sides of the rectangle.
- Fold larger towel in half. This will be the pillow itself.
- Pin the pocket rectangle to the larger towel.
- Sew the sides and bottom of the pocket to the larger towel, leaving the top open.
- Now turn the larger towel right sides together (with the pocket inside) and sew two and a half of the open sides, leaving one half of a side for turning and stuffing the pillow.
- Turn and stuff the pillow.
- Sew the turning hole closed, and top stitch around the pillow if you’d like extra credit.
16. Cute Soda or Beer Case Wrap
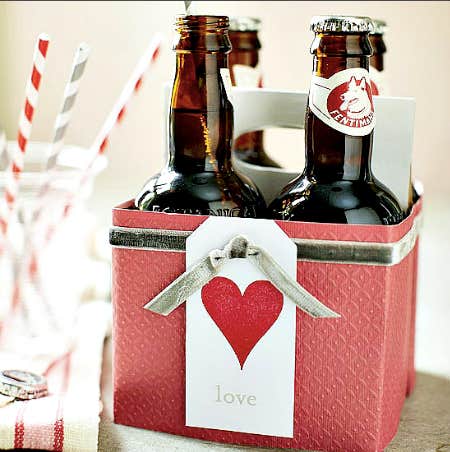
Supplies:
- Red scrapbook paper
- Cardboard holder for bottles
- Double-stick tape
- Ribbon
- Stamped tag
Instructions:
- Wrap a piece of embossed red scrapbook paper around the cardboard case, securing with double-stick tape.
- Fold another piece of cardstock to cover the handle and cut out the opening.
- Embellish the package with a length of narrow velvet ribbon and a stamped tag.
17. Candy and Nut Mustache Canister
By PLAID
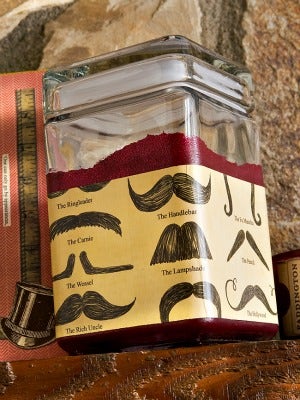
PLAID Supplies:
- FolkArt ® Enamels™ — Berry Wine, 2 oz.
- Mod Podge ® Matte, 8 oz.
Other Supplies:
- Rubbing alcohol
- Glass canister Painter's tape
- Spouncer paintbrush
- Foam paintbrush
- Mustache themed scrapbook paper
Instructions:
- Wipe the canister with rubbing alcohol to clean it. Peel a strip of blue painters tape. Tear the tape in half lengthwise. Tape off the top layer of the canister with the torn edge facing down. This will create a tattered edge.
- Dip the spouncer brush into the berry wine paint, tap off the excess and tap all over the canister. Allow to dry. Follow the instructions on the bottle for setting the paint.
- Trim the paper to fit the top of the canister and around the canister. Coat the back of the papers with Mod Podge, position onto the canister, smooth any air bubbles with your finger, wait 15 minutes and top coat with a layer of Mod Podge. Allow to dry.
18. "You Comfort Me" Basket
By Trusper
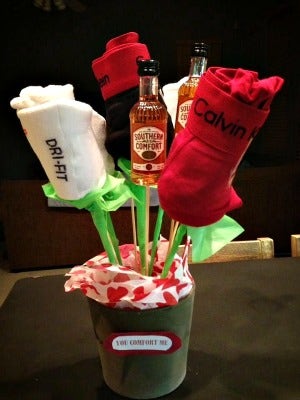
Go the extra step by making a bouquet of his favorite things to show how comfortable you are with him! The best part is that you won't need a lot of material to perfect this gift.
Supplies:
- Boxers
- Small bottled drinks (preferably his favorite brand)
- Wooden craft sticks
- Festive tissue paper
- Basket to hold everything together
Instructions:
- Stuff the bottom of the basket with tissue paper; this will stabilize the "plant" once you put everything in.
- Place tissue paper around the inside of the basket, making sure that it sticks out over to add color to your gift.
- Wrap each craft stick in green tissue paper to make the "stem."
- Use double-sided tape to stick the craft stick to the back of the bottled drinks. This will work best with a fun sized drink.
- Repeat for the boxers; however, make sure that the stick is inside to hold things steady.
19. Cuddle Kit for Two
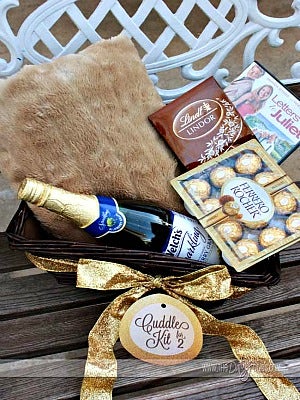
Supplies:
- A soft, fuzzy blanket
- Champagne
- Chocolate truffles
- A lovey, dovey movie
- Candles
- Romantic music
- Cuddle Kit Tag
20. "Sock" it to Him
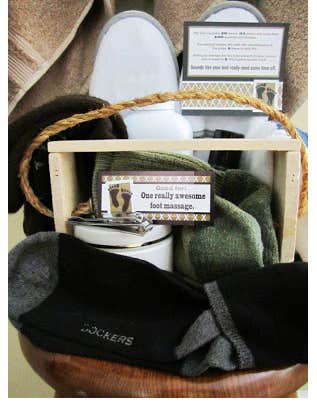
Supplies:
- A basket or gift bag
- Slippers (as many as you want)
- Socks (as many as you want)
- Any foot items you want to put in such as nail clippers, lotion, foot powder, foot scrub
- Coupon for a foot massage
- Gift tag
21. Sweet Anniversary Gift
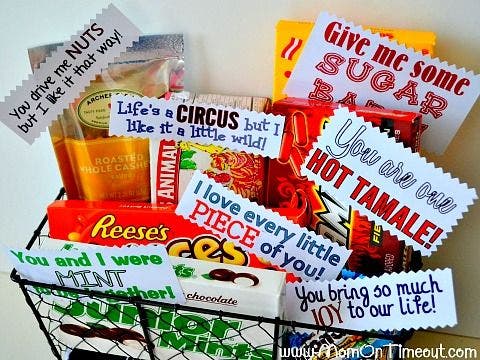
Supplies:
- Different types of candy
- Pajamas to line the bottom of the basket with
- Note tags for candy
22. "Still Nuts About You" Jar
By Corner House
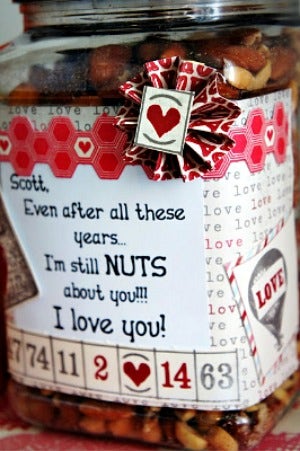
Supplies:
- Jar of nuts
- Valentine's Day-inspired decorative paper
Instructions:
All you have to do is hot glue a quirky label onto the jar. How sweet is that?
23. Tool Kit Gift
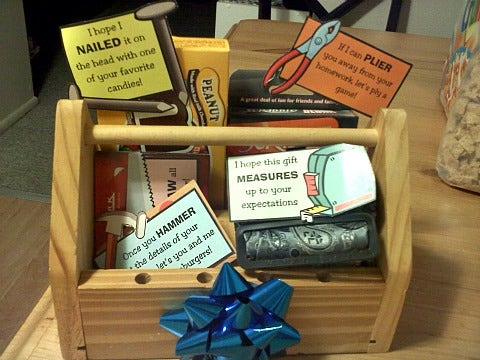
Supplies:
- Wooden tool box (alternative: plastic tool box, canvas tool pouch)
- A game. I used a scrabble slam card game. (pliers)
- Gift card to favorite movie theater. (saw)
- Favorite Candy (nails)
- Gift card to favorite restaurant. (hammer)
- One more gift of your choice. (tape measure)
- Tags for gift basket
24. Printable Cupcake Toppers
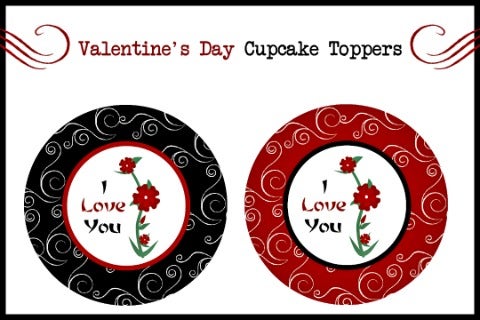
Supplies:
- Cupcake topper designs
Instructions:
Print them out, use a 2" punch, and attach some toothpicks or lollipop sticks to the back, and you have yourself a cupcake topper!
25. Valentine Love Lotto
By It's Doable
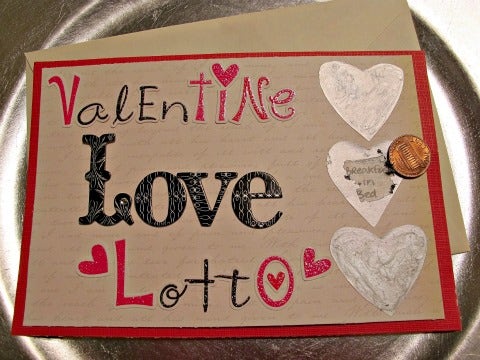
Supplies:
- Con-Tact paper
- Scrapbook paper of your choice
- Sticky letters
- Tape
- Metallic acrylic paint
- Paint brush
- Disposable mixing bowl
- Dish washing detergent
- Piece of scrap paper
Instructions:
- Choose the size of card you'd like to make. You can use a 7.5x5 inch to fit into the envelope of the Valentine's Day card.
- Cut your scrapbook paper slightly smaller than your size and mat it on a larger sheet of scrapbook paper. Then cut this to your size. (When matting, tape or glue your smaller paper on to a larger paper and then cutting it so that you get an even boarder.)
- Fold your piece of scrap paper in half, using the folded edge as the "center" of the heart, cut half of a heart shape. Your size for this will depend on your card size and how many scratch offs you want.
- Tape your piece of Con-Tact paper down, paper side up and trace around your heart.
- Flip your Con-Tact paper over and tape it down so the clear side is now face up.
- Mix 1 part dish washing detergent to 2 parts paint. Use 2 tsp. dish washing detergent, 4 tsp. paint.
- Paint this mixture over the clear Con-Tact paper as evenly as possible and let dry. (Takes about 3 hours).
- While this is drying, create your card. Take that heart template you cut out and LIGHTLY trace where you want your scratch offs and then design the rest of your card around it. Inside of each soon to be scratch off, write what your Valentine will "win." After it is all done, erase the hearts.
- Once it is completely dry, do a second coat. Remember that point in a craft you never want to do, but you always regret skipping, this is it. Just do the second coat so you don't see through the hearts when you put them over the words.
- Carefully cut out the hearts and place them on top of your card where you want them. Remove one and peel off the paper and stick it down, repeat with the rest.
26. Pencil Me Happy
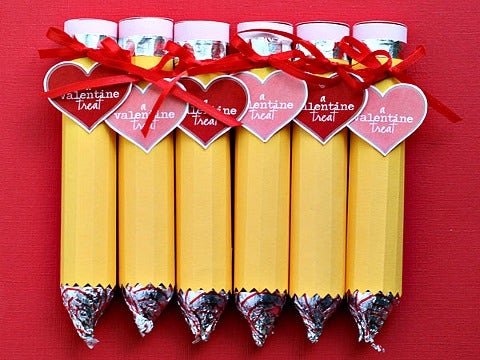
Supplies:
- Yellow card stock
- Pink card stock
- Scissors
- Pinking scissors
- Double-sided tape
- Pencil
- Aluminum foil
- Glue
- Rolos
- Hershey’s kisses
Instructions:
- Cut 3.5” x 4.5” piece of yellow card stock and score every 1/4” inch, lengthwise.
- Work pinking scissors along short side of paper and wrap the paper around Rolos bar.
- Cinch with double-sided tape.
- Cut 3.5” by 3/8” piece of pink card stock.
- Wrap around top of Rolos to create eraser, then cut out circle on pink card stock to create top of eraser.
- Cut 3.5” x 3/8” piece of foil and use to cover seam where yellow and pink meet.
- Glue a Hershey’s kiss to other end of Rolos for the pencil point.
27. Candy Box Album
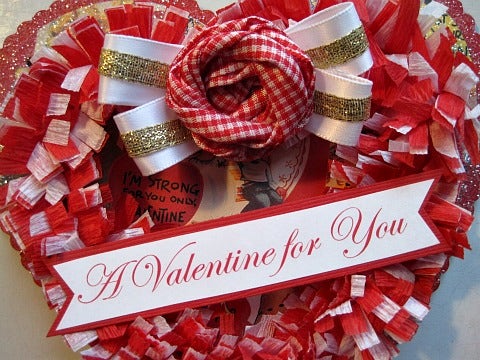
Supplies:
- Chipboard/cereal box
- Printed paper
- Glue stick
- Tacky glue
- Glitter
- Hole punch
Instructions:
- A heart cut from chipboard (a cereal box will do) is traced on the back side of card stock. Scallop cut around drawn line.
- Using chipboard heart as a pattern, cut a second heart from cardboard, a third from printed paper. Glue stick all layers together for a nice sturdy base, called the "Sandwich Method." Glue Sandwich to chipboard heart.
- Backside of album is covered with printed paper cut slightly larger than drawn line. Don't forget to punch a hole with each sheet of paper added for jump ring.
- Spread thin layer of Tacky Glue with a few drops of water added to thin slightly to outer edge of first one half of heart including scallop, apply glitter, and then other half, apply glitter; set aside to dry.
- View the image, print 8x10 sheet of paper, or print preview, choose percentage right for you.
- PAPER CRAFT TIP: To create a smaller sized pattern of the original heart shape and maintain same shape, trace half of template onto folded paper, create smaller size needed by keeping pencil line same distance from original drawn line.
- Project: Cut from cardboard one small heart, cut one printed paper heart. Glue stick together.
- Six layers of alternating red and white crepe paper length of circumference of heart is sewn slightly off the center line of width of crepe. (You can sew again a scissors width away from first sewn line to be able to use both halves of crepe.) Cut 1/8" slits up to sewn line length of crepe. Before separating cut crepe, hot glue sewn edge to edge of small heart. Separate crepe.
- Hot glue smaller heart to scalloped base.
- Cut (4) 3" strips of white satin ribbon 5/8" wide, 3" strips gold ribbon 1/4" wide, layer gold over white and staple ends together.
- Hot glue two ribbon pieces together twice to be placed underneath rosette created. Lightly twist length of 1 1/2" wide wired ribbon.
- Hot glue a first turn of the ribbon to create a center. Twisted ribbon is then circled around center, hot glue last turn underneath rosette created. Hot glue to ribbon loops, hot glue to crepe.
28. Book of Love Coupons
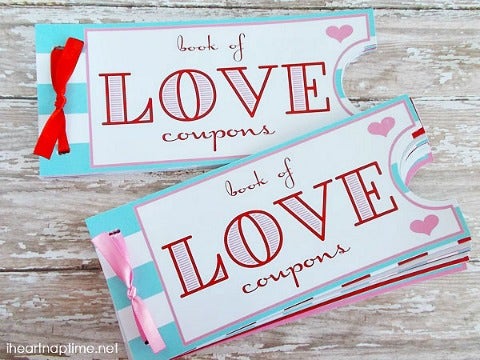
Supplies:
- Printable Book of Love Coupon
Instructions:
This one is easy-peasy. Simply print out the coupons you want, cut them out, and tie a bow through the paper.
29. A Kiss in Your Pocket Flipbook
By Color Me Katie
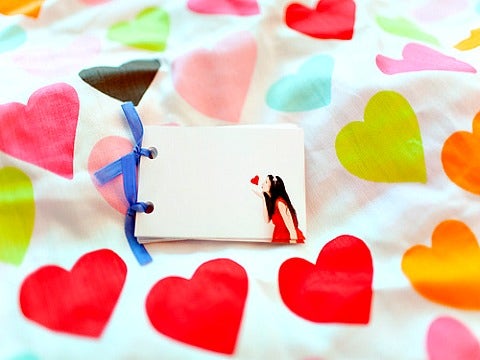
Supplies:
- Photo printer
- Hole punch
- Ribbon
Instructions:
- First, take a picture of yourself blowing a kiss.
- Then print a bunch of little pictures and use a red marker to draw one heart on the first picture, two on the second and so on..
- Punch holes on the end and tie it together with ribbon.
When she isn't researching the latest viral news, lifestyle, and relationship studies, binge-watching YouTube videos (for science!) or creating vision boards on the hottest beauty and fashion trends on Pinterest, Cassandra Rose is nerding out over her comic books and all things Sherlock Holmes.

